

Espresso wants fine grounds (roughly 200 to 400 microns), pour-over sits medium to medium-fine, French press needs coarse, cold brew wants extra-coarse, and Turkish coffee gets ground almost to powder. Those are starting points, not fixed rules. The chart below gives exact ranges, but every cup still gets tuned by taste: sour means go finer, bitter means go coarser.
TL;DR:
- Espresso requires a grind size of 200 to 400 microns, with adjustments made in tiny increments to prevent under- or over-extraction.
- Pour-over devices like V60 and Kalita Wave benefit from medium-fine to medium coarser grinds, depending on filter shape and flow rate.
- Cold brew and French press demand extra-coarse and coarse grounds, respectively, to avoid over-extraction and muddy textures during long steeping.
- Grind particle distribution affects flavor balance, with narrow spans producing more predictable results and wide spans risking bitter-sour combinations.
- For consistency, a burr grinder and grinding fresh beans before brewing are more effective than chasing precise micron settings alone.
Table of Contents
- Grind Size Chart: Micron Ranges by Brew Method
- Grind Sizes by Brew Method: What Actually Changes the Cup
- How Grind Size Changes Extraction and Flavor
- How to Dial In Your Grind: A Step-by-Step Testing Protocol
- Grinders and Grind Consistency: Why Distribution Matters as Much as Size
- Micron, D50, and Grind Vocabulary Explained
- Storage, Freshness, and Grind Timing
- Our Take on Grind Charts and Dialing In
- Which Purelight Coffee to Grind for Your Brew Method
- Sources
- FAQ
Grind Size Chart: Micron Ranges by Brew Method
A grind size chart only earns its keep if the numbers are specific enough to act on. The ranges below combine sieve-based measurements with the practical starting points most brewers actually use, so you can match a setting to a method before you touch the taste.
Micron figures here describe D50, the midpoint particle size in a batch of ground coffee. Half the particles are larger, half smaller. It’s the standard way grind uniformity gets measured in sieve analysis, and it’s the number most grind charts are quoting even when they don’t say so.
| Grind label | Common methods | Approximate D50 range | Texture analog | When to use it |
|---|---|---|---|---|
| Extra-fine | Turkish coffee | 50–140 microns | Powdered sugar or flour | Unpressurized, boiled brewing where grounds stay suspended in the cup |
| Fine | Espresso, Moka pot (fine end) | 200–400 microns | Fine table salt, slightly softer than sand | High-pressure, short-contact brewing measured in seconds |
| Medium-fine | Pour-over (V60, Kalita Wave), Moka pot | 400–600 microns | Coarse sand | Drip methods where water passes through in 2 to 4 minutes |
| Medium | Drip machines, some pour-over recipes | 600–800 microns | Raw sugar | Standard automatic drip and flatter pour-over cones |
| Medium-coarse | Chemex, some AeroPress recipes | 700–900 microns | Coarse raw sugar or kosher salt | Thick-filter pour-over that needs a slower flow to avoid choking |
| Coarse | French press, percolator | 800–1,100 microns | Sea salt or breadcrumbs | Full immersion brewing with a metal filter |
| Extra-coarse | Cold brew | 1,000–1,400 microns | Peppercorns | Long steeps, 12 to 24 hours, where over-extraction is the main risk |
These ranges come from micron mapping used across grind-chart sources and align closely with sieve-derived particle measurements published in grinder testing guides. The two data sets don’t always agree to the micron. Espresso ranges, for instance, get quoted anywhere from 200 to 400 microns depending on the source, partly because roast level, dose, and basket design all shift the ideal number slightly. Treat any chart, including this one, as a “north star” reading, a phrase Fellow’s own grind guide uses to describe exactly this kind of reference. It gets you in the right neighborhood. Taste gets you the rest of the way.
Notice the overlap between neighboring categories. Medium-fine and medium blur into each other around 600 microns, and medium-coarse and coarse do the same near 800. That overlap isn’t sloppiness in the data. It reflects how grinders actually behave: no burr set produces a single particle size, it produces a distribution, and where you land inside that distribution depends on your specific machine.
Grind Sizes by Brew Method: What Actually Changes the Cup
A chart tells you where to start. It won’t tell you why espresso punishes a coarse grind or why French press turns to mud if you go too fine. Here’s the method-by-method logic.
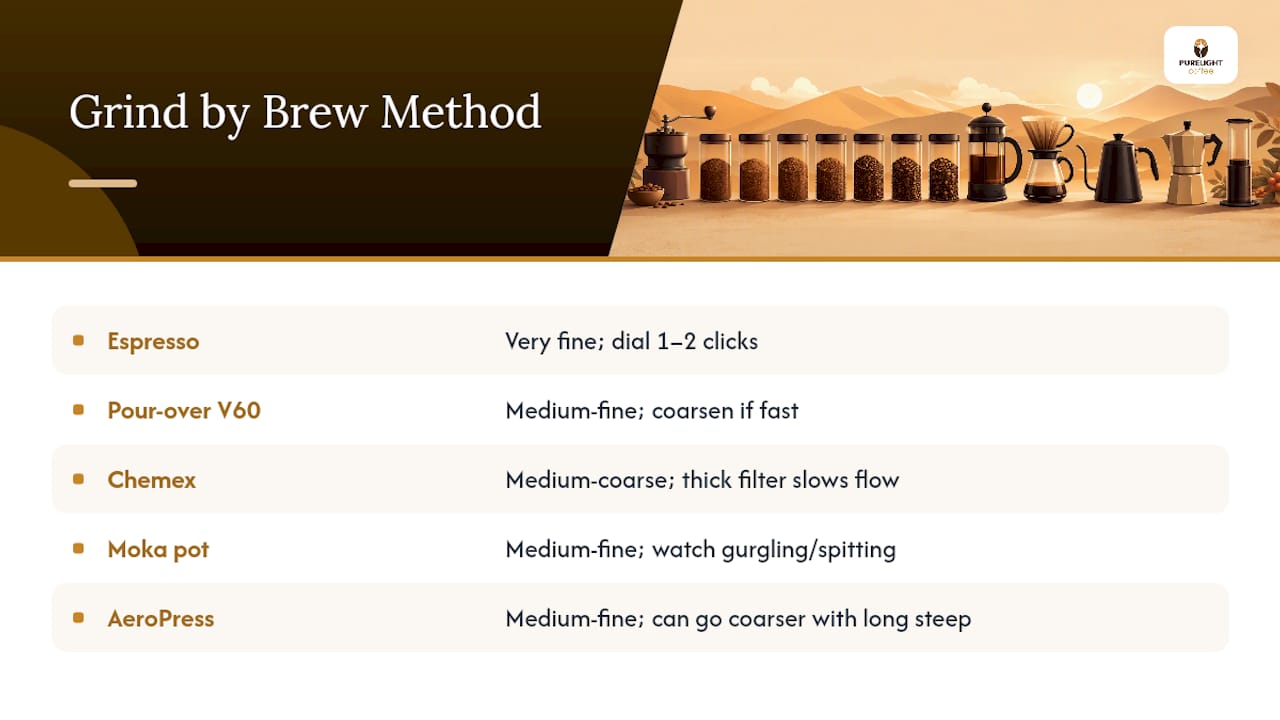
Espresso runs water through the puck at roughly 9 bars of pressure for 25 to 30 seconds, so grind size controls resistance, not just flavor. Too coarse and the shot runs fast and sour, tasting thin and sharp. Too fine and it chokes, dripping slow and bitter, sometimes stalling the pump entirely. Dial espresso in tiny increments: on a grinder with click adjustments, move 1 to 2 clicks at a time and pull a new shot. Watch the puck after extraction, too. A dry, cracked puck with visible channels usually means the grind was too coarse or the tamp was uneven; a soupy, waterlogged puck points to too fine a grind or too much water pressure resistance building up.
Pour-over covers a range of devices, and the shape of the filter changes the ideal setting. A V60’s cone shape and large single hole drain fast, so it tolerates a slightly finer grind than a flat-bottom Kalita Wave, which drains more slowly through three smaller holes. Start medium-fine for a V60 and nudge toward medium if the brew finishes too quickly and tastes thin.
Chemex deserves its own note because the filter paper is roughly twice as thick as standard pour-over paper. That thickness slows the flow rate on its own, so Chemex recipes typically start a notch coarser (medium-coarse) than a standard V60 recipe using the same beans. Grind Chemex like V60 and you’ll get a sluggish, over-extracted, bitter cup even with a perfectly good bean.
Moka pot sits in an odd middle zone: finer than drip coffee, coarser than espresso. The stovetop pressure is much lower than an espresso machine’s, so a grind that’s too fine causes the same problems as an over-fine espresso grind, stalling and bitterness, while too coarse lets water rush through before it extracts much of anything. Aim medium-fine and watch for gurgling or spitting during the brew, which usually signals the grind is too fine for the pot to push through cleanly. Our guide to Moka pot coffee covers the ratio and heat side of that balance in more detail.
AeroPress is the most forgiving brewer on this list because both grind size and steep time are adjustable. A standard recipe uses medium-fine grounds with a 1 to 2 minute steep before pressing, similar to pour-over. An inverted, longer-steep recipe can run coarser, closer to French press territory, since the extra contact time compensates for the larger particles. If you’re testing AeroPress grind, change one recipe variable at a time, or you won’t know which adjustment fixed (or broke) the cup.
French press and cold brew are both immersion methods, but they don’t share a grind setting despite the family resemblance. French press steeps for 4 minutes at coarse, letting a metal mesh filter through fines that would otherwise turn the cup muddy. Cold brew steeps for 12 to 24 hours at room temperature or in the fridge, and that much time at extra-coarse still pulls plenty of flavor while keeping bitterness and grit in check. Grind cold brew at French press coarseness and the long steep will over-extract it badly.
Turkish coffee is the extreme end of the chart. The grounds need to be nearly powder, finer than espresso, because the coffee is boiled directly with the grounds still in the pot and served unfiltered. Most home burr grinders, even good ones, can’t reach this fineness reliably. A dedicated Turkish grinder or a mortar-style mill built for that specific range is usually necessary if you want the real texture.
How Grind Size Changes Extraction and Flavor
Grind size controls one thing directly: surface area. Finer grounds expose more coffee to water in the same amount of time, which means faster, more intense extraction. Coarser grounds expose less surface area, so extraction slows down. Every brew method balances grind size against contact time to hit a target extraction window, and when that balance is off, the cup tells you exactly how.
A sour, thin, sharp cup usually means under-extraction: the water didn’t pull enough out of the coffee before the brew finished. Grind size and extraction speed are directly linked, so the fix is almost always to grind finer, increasing surface area so more flavor comes out in the same time. A bitter, harsh, or astringent cup usually means over-extraction: too much got pulled from the coffee, including the compounds that turn unpleasant late in the process. Grind coarser to slow that down.
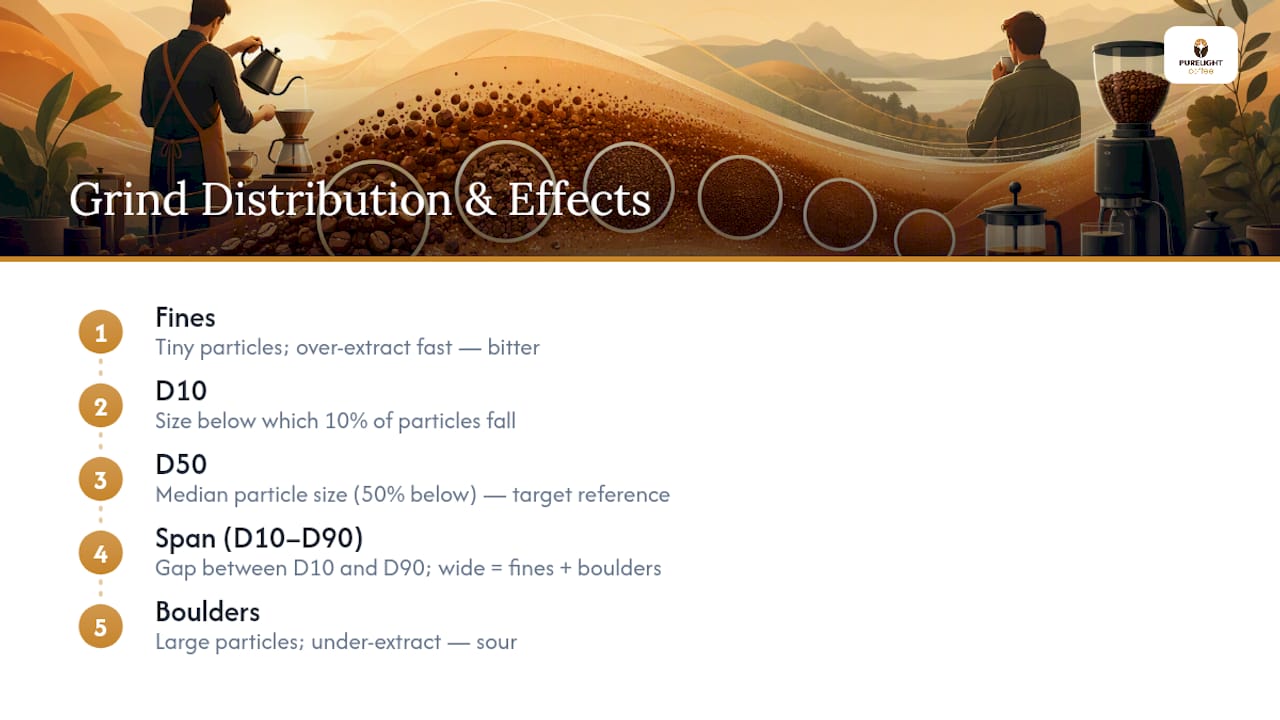
Grind distribution complicates the simple version of this rule. No grinder produces one uniform particle size. It produces a spread, described by D10, D50, and D90, the sizes below which 10%, 50%, and 90% of particles fall. The gap between D10 and D90 is called the span, and a narrow span means most particles cluster close to the target size. A wide span means you’ve got a mix of “fines” (tiny particles that over-extract fast and turn bitter) sitting alongside “boulders” (large chunks that barely extract at all and taste sour), often in the same cup at the same time. That combination is why a bad grinder can produce a cup that’s simultaneously bitter and sour, muddled instead of balanced, even when the average D50 number looks correct on paper.
How to Dial In Your Grind: A Step-by-Step Testing Protocol
Dialing in only works if you isolate grind size as the single variable. Change your ratio, water temperature, or brew time at the same time, and you won’t know what actually fixed the cup.
- Lock a baseline recipe. Pick a coffee-to-water ratio (a common starting point is 1:16 for pour-over) and a water temperature, and keep both fixed for the whole test. Our brew ratio guide has starting ratios by method if you need one.
- Brew and taste. Note whether the cup reads sour, bitter, or balanced. Don’t overthink the first impression; your gut read is usually right.
- Adjust in small steps. On a grinder with numbered settings, move 1 to 2 clicks at a time toward finer (if sour) or coarser (if bitter). On a hand grinder with click notches, the same logic applies. Big jumps overshoot and waste beans.
- Change only the grind. Keep the ratio and temperature exactly where they were in step 1.
- Brew again and compare. Track total brew time alongside taste. A faster-than-expected brew with sourness confirms too coarse; a slow, sluggish brew with bitterness confirms too fine.
- Repeat until the cup balances. Most dial-ins take 2 to 4 rounds. If you overshoot from sour straight to bitter, you know the sweet spot sits between your last two settings.
Clogging and channeling are diagnostic shortcuts worth knowing. If water pools on top of a pour-over bed instead of draining evenly, or an espresso shot stalls mid-pour, the grind is very likely too fine for that method. If water rushes through in half the expected time and the bed looks uneven with visible dry spots, the grind is probably too coarse or unevenly distributed.
Pro Tip: Keep a simple log, even just notes in your phone: grind setting, ratio, brew time, and one word for taste. Three or four brews in, patterns show up that a single tasting never reveals.
Grinders and Grind Consistency: Why Distribution Matters as Much as Size
Burr grinders come in two main types, flat and conical, and both outperform blade grinders for one simple reason: they cut coffee to a consistent size instead of smashing it into random fragments. A blade grinder produces a mix of dust and chunks in the same batch, which means a wide span, plenty of fines and boulders, and a cup that’s hard to predict or repeat. If you’re only going to upgrade one piece of gear, a burr grinder is the highest-leverage purchase most home brewers can make.
Distribution differences between grinders can be significant. Sieve testing on consumer grinders has shown particle-size variation of up to 1,000% between models at the same nominal setting, which explains why the same “medium” setting on two different grinders can produce noticeably different cups. Espresso grinders aimed at specialty use generally target a tighter distribution, minimizing fines while keeping the bulk of particles close to the target D50, because espresso’s short brew time and high pressure punish a wide span more than slower methods do.
A few low-cost habits improve consistency without buying new equipment. Purge the first few seconds of grounds if your grinder tends to retain old coffee in the chute, since stale leftover grounds skew every fresh dose. Dose by weight, not scoop, since volume measurements shift with grind size and bean density. A sieve like a Kruve system lets serious home brewers sift out fines and boulders entirely, though for most people, a consistent burr grinder and a consistent routine get most of that benefit without the extra step.
Micron, D50, and Grind Vocabulary Explained
A micron is one millionth of a meter, small enough that particle size in coffee grounds is only meaningful in that scale. D50 is the midpoint of a grind’s particle-size distribution: half the ground coffee is finer than that number, half coarser. D10 and D90 mark the finer and coarser edges of the bulk of the grounds, and the gap between them, the span, tells you how tight or scattered the grind actually is.
A narrow span matters more than most brewers realize. Two grinders can share the same D50 and produce different cups if one has a much wider span, because narrow, repeatable distribution is what makes dialing in predictable from one brew to the next. Tie the numbers back to texture: table salt sits near the espresso range, sand near pour-over, and coarse sea salt or peppercorns near French press and cold brew. Kruve-style sieve sizing is how labs and grinder reviewers turn “feels about right” into a number you can compare across machines.
Storage, Freshness, and Grind Timing
Grind coffee right before brewing, not the night before. Ground coffee has vastly more surface area than whole beans, so aromatic compounds escape within minutes of grinding, not days. A bag of whole beans holds its character far longer than the same coffee already ground.
Roast age changes how a bean grinds and brews. Very fresh coffee, roasted within a day or two, releases extra carbon dioxide during brewing, which can slow water flow and mimic the signs of too fine a grind; going slightly coarser in the first week after roast often compensates. Store beans in a sealed bag with a one-way valve, kept cool and dry, away from direct light. Skip the freezer for everyday storage; repeated trips in and out of cold storage introduce condensation that degrades flavor faster than room-temperature storage does. Batch grinding a week’s worth of coffee is convenient but trades away freshness. Single-dose grinding right before each brew costs a little more time and gets you a noticeably better cup.
Our Take on Grind Charts and Dialing In
Most grind advice treats the chart as the destination. It’s the starting line. I’d argue the biggest mistake home brewers make isn’t picking the wrong micron range, it’s stopping there and blaming the beans when a cup tastes off, instead of moving one click and tasting again.
The other thing that gets underweighted: consistency matters more than precision for most people’s setups. A grinder with a tight, repeatable distribution at a slightly “wrong” micron number will out-brew a wide-span grinder sitting at the textbook-perfect D50, because you can dial around a consistent grinder with confidence. You can’t dial around inconsistency, since the same setting gives you a different cup every time.
Our roasting partner in Bend, Oregon supplies the coffee details on Purelight product pages. Choose whole bean when you want to adjust grind size for your brewer. Our pods need a K-Cup-compatible machine. For current production and delivery estimates, see the Shipping Policy.
— Shawn Lee
Which Purelight Coffee to Grind for Your Brew Method
If you’re brewing drip or pour-over daily and want one bag that behaves predictably across both, Smith River (Medium House Blend) is built for exactly that range, medium to medium-fine, without demanding constant recalibration. For dialing in specifically, a single origin gives you a cleaner read on what grind changes are actually doing to the cup; Brazil Classic is a straightforward, low-fuss bean for that kind of testing since its flavor profile stays consistent shot to shot. And if grinding isn’t part of your morning at all, Flathead Valley dark roast pods sidestep the whole conversation while still landing a full-bodied cup.
If you’re not sure which format fits your routine, start with a single bag of whichever matches your brew method above and build from there.
Sources
- Coffee grind size - for espresso, moka pot, V60, pour-over …
- Grind Size & How It Affects Consistency & Flavor - Perfect Daily Grind
- Grind Uniformity Measurement: Sieve Analysis
- Coffee Grind Size Chart: Numbers & Guide | Fellow Coffee
FAQ
How Do I Choose the Right Grind Size?
Match the grind to your brew method using the chart above as a starting point, then taste and adjust: go finer if the cup tastes sour or weak, coarser if it tastes bitter or harsh.
What’s the Best Grinder for Daily Use?
A burr grinder, flat or conical, beats a blade grinder for daily use because it produces a consistent particle size instead of a random mix of dust and chunks, which makes every cup easier to reproduce.
What Should My Grind Amount (Dose) Be?
Dose depends on your ratio, not a fixed number: a common pour-over ratio is 1 gram of coffee per 16 grams of water.
What’s the Best Grind Size for Coffee Overall?
There’s no single best grind size since every brew method needs a different range, from near-powder for Turkish coffee to peppercorn-sized for cold brew; the best setting is the one matched to your specific method and then adjusted by taste.
Should I Buy Whole Bean or Ground Coffee?
Whole bean lets you grind fresh right before brewing and adjust the setting as you dial in, which preserves more flavor than pre-ground coffee that’s already lost aroma sitting on a shelf.
Recommended
- Coffee Brew Ratio: Practical Ratios and Recipes to Try
- Small-Batch Coffee: What Home Brewers Need to Know
- Single Origin Espresso for Home Baristas: How to Dial In
This article was produced by the Purelight Coffee team. It’s general coffee and brewing information, not professional or medical advice - results will vary with your equipment, water, and beans.


