

Use 16 grams of coffee to 240 grams of water, a 1:15 ratio, ground medium fine like table salt. Brew standard (not inverted), water at about 200°F, steep for 1 to 1.5 minutes, then press for 20 to 30 seconds. That’s the whole recipe. Everything below explains why it works and how to bend it to your taste.
TL;DR:
- The ideal AeroPress ratio is around 1:15, with adjustments to tighter or looser ratios to increase strength or create a lighter cup, respectively.
- Grind size should resemble table salt, with finer grounds extracting more flavor and coarser grounds preventing over-extraction and bitterness.
- Steep time of 45 to 75 seconds, and pressing slowly over 20 to 30 seconds, are crucial for consistency and flavor control.
- Using a burr grinder and precise scale significantly improves repeatability and allows for more accurate recipe tuning.
- Changing only one brewing variable at a time helps identify the best adjustments for your preferred flavor profile.
Table of Contents
- The Everyday AeroPress Recipe, and Why It Works
- How Do You Brew AeroPress Step by Step?
- What Are the Best AeroPress Variations to Try?
- How Do You Fix a Sour, Bitter, or Weak Cup?
- What Equipment Do You Actually Need for AeroPress?
- Ratio Math and Bypass Calculations Explained
- Where Purelight Coffee Fits in Your AeroPress Routine
- Why Reproducible Recipes Beat Novelty
- Try These AeroPress Recipes With Coffee Built for Them
- Sources
- FAQ
The Everyday AeroPress Recipe, and Why It Works
A 1:15 ratio sits at the sweet spot between a cup that tastes thin and one that tastes like it’s trying too hard. Go tighter, say 1:13, and you get more body and caffeine punch. Go looser, 1:17, and you get a cleaner, lighter cup that’s easier to drink black. Most home brewers land on 1:15 as their baseline and adjust from there once they know their own preferences.
Grind matters more than most beginners think. You want a texture close to table salt, coarser than espresso, finer than drip. Too coarse and water runs through fast without pulling enough flavor out of the grounds, leaving you with a sour, hollow cup. Too fine and you’ll extract bitterness before you even start pressing, plus you’ll fight the plunger the whole time.
Water temperature around 200°F is your starting point for a medium roast. Push it hotter, closer to 205°F, for light roasts that need more energy to extract fully. Pull it down toward 175°F to 185°F for dark roasts, which already give up flavor easily and turn ashy or bitter if you scald them.
Pro Tip: Keep a small notebook or a notes app entry with your last three brews. Write down grind setting, water temp, and how it tasted. You’ll dial in your ideal cup in a weekend instead of a month.
Quick adjustments without overhauling the recipe:
- Want a stronger cup without more bitterness? Add 1 to 2 grams of coffee, keep water the same.
- Want more volume for a bigger mug? Scale both numbers up together, keeping the 1:15 ratio (18 g coffee, 270 g water).
- Want it weaker? Add 20 to 30 grams of water instead of cutting coffee, which preserves flavor balance better than a smaller dose.
One consistent finding across brewing guides: changing ratio changes strength, but changing grind and time changes extraction. Confusing the two is the single most common mistake home brewers make when a cup tastes “off” and they don’t know which knob to turn.
How Do You Brew AeroPress Step by Step?
This is the exact timed sequence for the everyday recipe above, using the standard upright method (not inverted).
- 0:00 — Rinse your paper filter with hot water in the cap, then screw the cap onto the chamber and set it on your mug or carafe. This clears papery taste and preheats the plastic.
- 0:00 — Add 16 grams of medium fine ground coffee to the chamber.
- 0:00 to 0:10 — Pour 240 grams of water at roughly 200°F over the grounds in a slow spiral, saturating everything evenly.
- 0:10 — Give it a firm 5 second stir with the AeroPress paddle or a spoon, breaking up any dry clumps stuck to the sides.
- 0:15 — Insert the plunger just enough to create a seal and stop dripping, without pushing down. This is the part people skip.
- 0:15 to 1:00 — Let it steep undisturbed for 45 to 75 seconds depending on your target (shorter for lighter, sweeter; longer for fuller body).
- 1:00 — Begin pressing down with slow, even pressure, aiming to finish over 20 to 30 seconds.
- 1:20 to 1:30 — Stop pressing the moment you hear a hissing sound. That’s air escaping through the wet grounds bed, meaning you’ve pushed out essentially all the liquid and are now forcing air through mud.
The seal you create at step 5 matters more than it looks. Without it, water keeps draining through the filter during your steep time, which means you lose control over exactly how long the coffee actually sits in contact with the water. A clean seal turns your AeroPress into a closed immersion chamber for those 45 to 75 seconds, which is what makes the recipe repeatable from one morning to the next.
Pressing speed matters: pressing too hard and fast can extract bitterness from uneven grounds. Aim for steady, moderate pressure, similar to pressing a bike pump, not slamming a door.
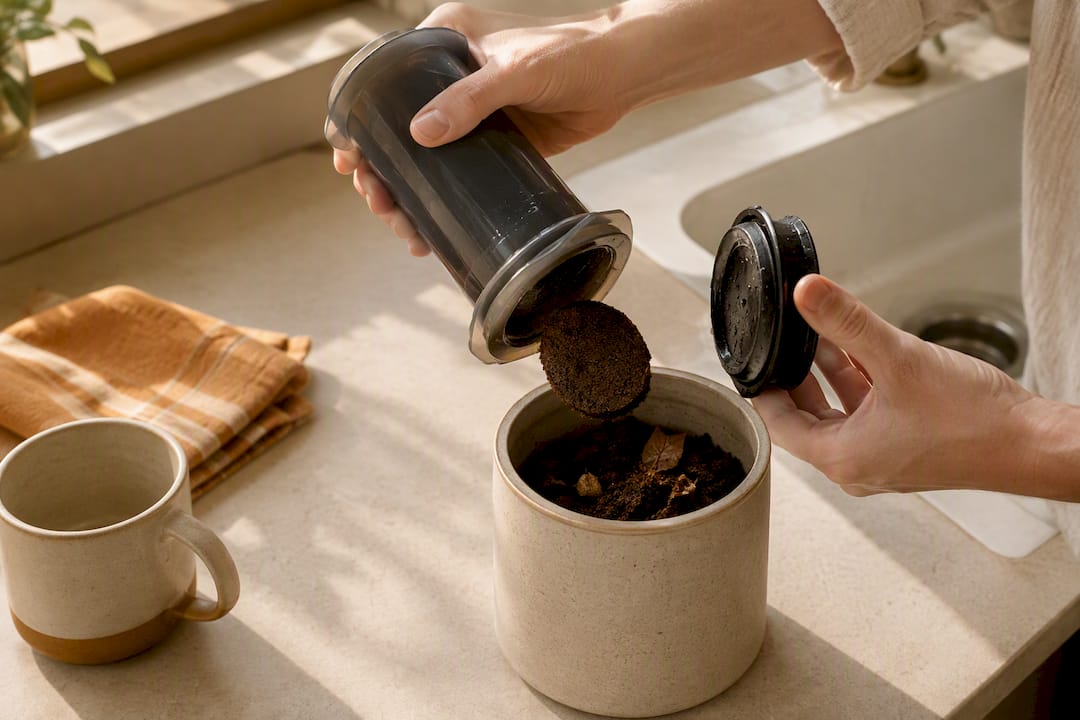
Cleanup takes under a minute: unscrew the cap, pop the plunger back to eject the puck of used grounds straight into the trash or your compost bin, and rinse the rubber seal underwater. No scrubbing, no soaking.
What Are the Best AeroPress Variations to Try?
Once the everyday recipe feels automatic, these five variations solve different problems, from competition-style clarity to milk-drink concentrates.
James Hoffmann’s recipe. Hoffmann’s published routine uses 11 grams of coffee to 200 grams of water at 99°C, with a short wait, a swirl instead of a stir, and a straight press. He skips rinsing the filter and preheating the brewer entirely, arguing neither changes the cup enough to bother. It’s a reliable baseline precisely because it strips the process down to almost nothing.
Inverted method. Flipping the AeroPress upside down for brewing, plungerside down, lets you steep longer without drip loss and gives you more control over stir timing. The tradeoff is stability: you’re balancing a full brewer on its cap, and AeroPress’s own instructions flag the inverted position as less stable than standard upright brewing. If you go inverted, brew over a flat, dry surface, not leaning over your mug.
Bypass, or dilution brewing. Brew a small batch of concentrated coffee, say 20 grams of coffee to 100 grams of water, then add another 140 grams of hot water after pressing to bring the total to 240 grams. This “bypass” technique became common practice among World AeroPress Championship winners because it separates two problems that are usually tangled together: how strong extraction should be, and how much liquid you end up drinking. Brew for peak flavor first, dilute to taste second.
Espresso-style concentrate. Push the dose way up, 18 to 20 grams of coffee to just 60 to 80 grams of water, press hard and slow, and you get a syrupy shot that stands in for espresso in milk drinks. It won’t taste identical to a machine-pulled shot, but it holds up fine under steamed milk.
Iced and cold. For hot-over-ice, brew your normal recipe with 30 to 40 grams less hot water than usual, then press directly over a glass filled with ice, letting the ice make up the difference as it melts. For a true cold version, use coarser grounds, cold water, and a much longer steep, closer to 12 to 24 hours in the fridge before pressing.
How Do You Fix a Sour, Bitter, or Weak Cup?
Sour usually means under extraction. Your coffee tastes sharp, thin, sometimes almost citric in an unpleasant way, and the finish disappears fast. Grind finer, raise your water temperature a few degrees, or extend your steep time before pressing.
Bitter means over extraction. You’ll taste it as a dry, ashy, almost burnt quality that lingers on the back of your tongue longer than it should. Grind coarser, drop the water temperature, shorten your steep, or start pressing a little sooner.
Weak or watery is a different problem entirely, not an extraction issue but a ratio issue. The fix is more coffee relative to water, not a grind or time change. Tighten toward 1:13 or 1:14 instead of stretching your steep time, which mostly just adds bitterness without adding real strength.
Pro Tip: Adjust only one variable at a time per brew. Changing grind, temperature, and steep time all at once makes it impossible to know which change improved the cup or to repeat successful results.
Run this simple three-brew test over one weekend:
- Brew 1: Your baseline 16 g to 240 g, medium fine grind, 200°F, standard steep and press.
- Brew 2: Same everything, but grind one setting finer on your grinder’s dial.
- Brew 3: Back to baseline grind, but drop water temperature by 10°F.
Taste all three side by side if you can, even reheated slightly. You’ll usually spot your preference within these three cups, and now you know exactly which direction to keep pushing.
What Equipment Do You Actually Need for AeroPress?
A burr grinder is the single upgrade that changes your cup the most. Blade grinders chop coffee into wildly uneven pieces, some near-dust and some barely cracked, so your AeroPress ends up extracting some particles too fast and others too slow in the same brew. A burr grinder produces consistent particle size, which is what makes a repeatable recipe possible in the first place.
A digital scale matters almost as much. Eyeballing “about two scoops” means your ratio drifts every single morning, and you’ll never know if a bad cup was your recipe or your measuring.
Beyond those two, here’s what earns a spot on your counter:
- Paper filters for a clean, tea-like clarity that highlights bright, fruity notes in lighter roasts.
- Metal (reusable) filters for more body and a slightly heavier mouthfeel, closer to a French press.
- A temperature-control kettle, gooseneck or basic electric with a display, so you’re not guessing at “just off the boil.”
- A cheap infrared thermometer as a substitute if a temperature kettle isn’t in the budget yet.
Maintenance is minimal: rinse the rubber seal on the plunger after every brew, and give it a deeper wash with mild soap every week or two so it doesn’t pick up stale oil buildup that can dull flavor over time.
Ratio Math and Bypass Calculations Explained
Ratio is just coffee weight to water weight, written coffee first. Sixteen grams of coffee with 240 grams of water is 16:240, which simplifies to roughly 1:15. Yield is the total liquid you end up with after pressing, which for an AeroPress usually lands close to your water input, minus a small amount absorbed by the grounds and filter.
Here’s the bypass math worked out in full:
- Brew a concentrate using 20 grams of coffee to 100 grams of water. That’s roughly a 1:5 ratio, much stronger than you’d ever drink straight.
- Press as normal, ending with close to 90 to 95 grams of concentrated liquid after grounds absorption.
- Add 140 to 145 grams of hot water directly to that concentrate.
- You land near 240 grams total, at an effective strength close to your everyday 1:15 recipe, but you extracted the flavor at a tighter, more controlled ratio first.
The advantage is real: brewing at 1:5 lets you extract at a more concentrated, controlled strength before diluting to taste, separating “how well did I extract this coffee” from “how strong do I want to drink it.”
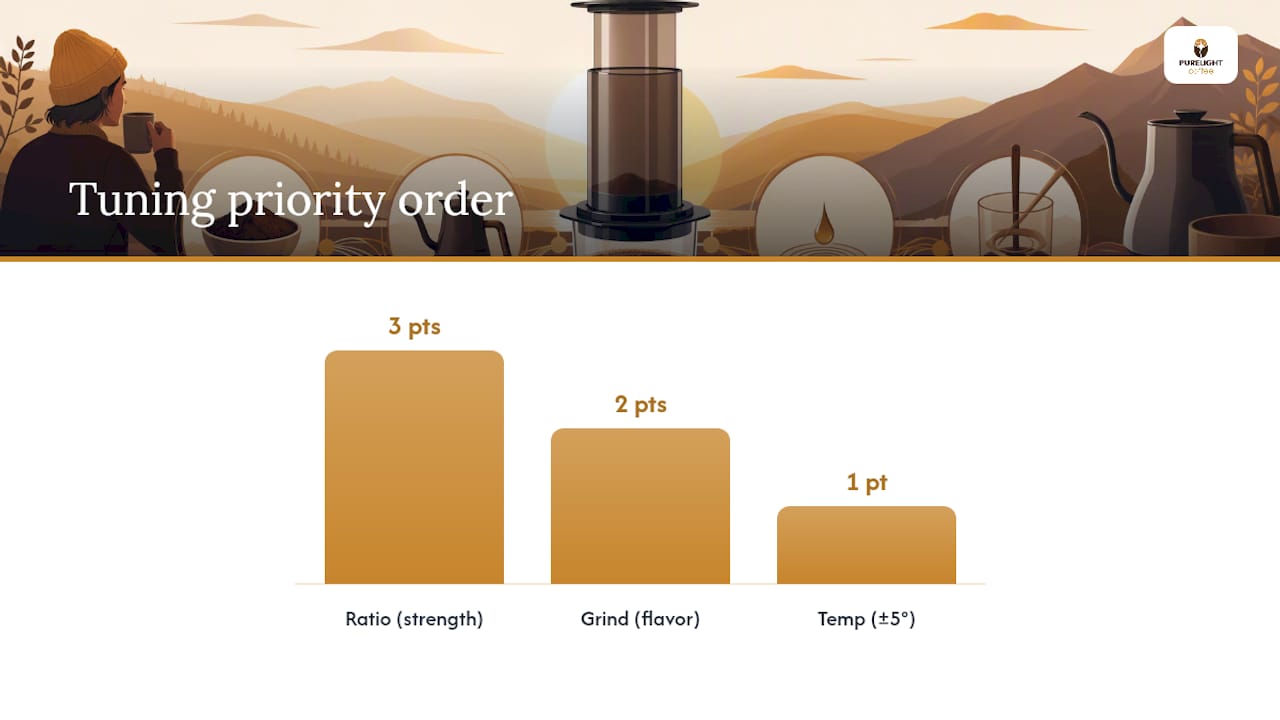
For daily tuning, follow this order of operations. Change ratio (dose) first if the cup is simply too weak or too strong. Change grind next if the flavor itself tastes sour or bitter regardless of strength. Change temperature last, since it’s the subtlest lever and easiest to mistake for a placebo if you’re not tasting carefully. Keep every experiment small, one setting or five degrees at a time, and taste before changing anything else.
Where Purelight Coffee Fits in Your AeroPress Routine
Purelight Coffee is a specialty coffee brand offering small-batch roasted coffee through an online store. We sell single-origin coffees, house blends, decaf, K-Cup-compatible pods, instant coffee, and matcha, all shipped from an online storefront built around finding the roast that matches your everyday brewing routine.
Ratio guidance like the numbers in this article gets more room to breathe in our post on coffee brew ratios, which walks through more recipe combinations if you want to keep experimenting past the everyday recipe. The AeroPress rewards a brewer who pays attention to small changes and tastes the difference, which is exactly the kind of coffee drinker specialty roasting is meant for.
Why Reproducible Recipes Beat Novelty
The most common mistake I see home brewers make isn’t picking the wrong recipe. It’s changing three things at once and never learning which one mattered. A repeatable recipe you understand beats a fancy one you can’t explain.
Try three brews this weekend, changing exactly one variable each time: grind, then temperature, then steep. You’ll learn more about your own taste in an hour than a year of copying other people’s numbers. Then run that same experiment with a coffee from Purelight Coffee and see how a different origin shifts the results.
— Shawn Lee
Try These AeroPress Recipes With Coffee Built for Them
Purelight Coffee sells the specific roast levels that make each variation above worth trying, not just one all-purpose bag. High Lakes (Light Roast) pods are built for higher-temperature, brighter recipes, closer to 205°F, where light roasts need that extra heat to fully extract. Ethiopia Prime, our single-origin whole bean, is the one to reach for when you want the clarity that competition-style and bypass recipes are designed to showcase. Flathead Valley (Dark Roast) pods work best with the lower-temperature, shorter-steep end of the recipe range, since dark roasts turn bitter fast if you push them too hot or too long.
Shipping policies vary; check the company’s site for current details on orders and delivery. If you land on a favorite, Subscribe & Save gets you 15% off eligible products on repeat orders. Browse the single-origin collection or the full pods lineup and pick a bag to run through your next three-brew experiment.
Sources
- James Hoffmann’s Ultimate AeroPress Recipe - AeroPrecipe
- How to use AeroPress | AeroPress official
- AeroPress revisited: Coffee brew guide — Perfect Daily Grind
- The Best AeroPress Recipe (Plus the Ratios That Work) — Brew Better Co.
FAQ
What Is the Best AeroPress Recipe?
The most reliable everyday option is 16 grams of coffee to 240 grams of water, a 1:15 ratio, medium fine grind, water around 200°F, steeped 1 to 1.5 minutes, then pressed for 20 to 30 seconds. It’s forgiving enough for daily use and precise enough to adjust once you know your preferences.
What Is the Perfect Coffee-to-Water Ratio for AeroPress?
There’s no single perfect ratio, but 1:15 is the most common starting point for a balanced everyday cup. Tighten toward 1:13 for more strength and body, or loosen toward 1:17 for a lighter, more delicate cup.
What Is James Hoffmann’s Ultimate AeroPress Recipe?
Hoffmann’s published version uses 11 grams of coffee to 200 grams of water at 99°C, with a short wait, a swirl instead of a stir, and a direct press. He skips rinsing the filter and preheating the brewer, keeping the process deliberately minimal.
What Is the Best Way to Make Coffee With an AeroPress?
The standard upright method from AeroPress’s own instructions is the most consistent starting point: pour water over grounds, stir briefly, seal with the plunger, steep about 60 seconds, then press. The inverted method offers more steep control but carries a stability tradeoff AeroPress itself flags.
Does the Coffee I Use Change the Recipe?
Yes. Light roasts generally need hotter water, closer to 205°F, to extract fully, while dark roasts do better with cooler water, around 175°F to 185°F, and a shorter steep to avoid bitterness. Purelight Coffee’s light roast pods and dark roast pods sit at opposite ends of that adjustment, which makes them useful for practicing temperature tuning side by side.
Recommended
- Coffee Brew Ratio: Practical Ratios and Recipes to Try
- Single Origin Espresso for Home Baristas: How to Dial In
- Small-Batch Coffee: What Home Brewers Need to Know
- Roast 2 kg at a Time: Small Batch Roasting for Home Roasters
This article was produced by the Purelight Coffee team. It’s general coffee and brewing information, not professional or medical advice - results will vary with your equipment, water, and beans.


